
KineMaster – Video Editor
Screenshots
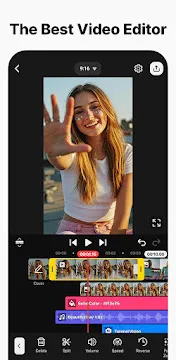
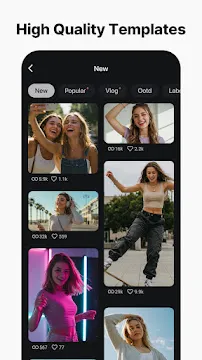
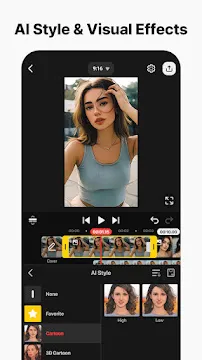
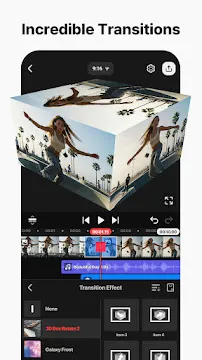
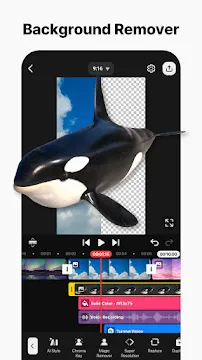
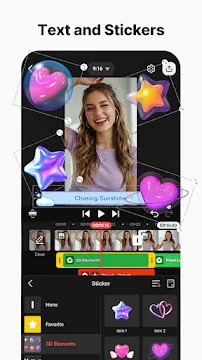
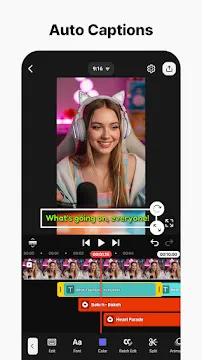
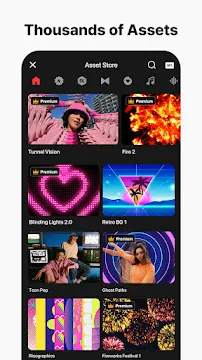
KineMaster is a powerful video editing app designed for Android users who want professional-quality results right from their mobile devices. It provides a full set of editing tools, visual effects, transitions, text features, and audio controls in an easy-to-use interface. You do not need to be a professional editor to use KineMaster. The app guides you through each step, making video creation simple and enjoyable.
With KineMaster, you can edit videos for social media, school projects, YouTube, or personal storytelling. The app supports multi-layer editing, so you can combine images, clips, text, stickers, and music in one project. And because everything happens in real time, you can preview and adjust your edits instantly. This makes KineMaster a great choice for content creators who want quick, high-quality results on the go.
What Is KineMaster? (The “Desktop-Class” Mobile Editor)
KineMaster is a professional video editing app designed for Android devices. It offers editing tools similar to desktop software, yet it remains simple enough to use on a phone. Unlike basic mobile editors, KineMaster focuses on detailed, multi-layer video editing for precise control and polished results.
A True Multi-Track Timeline Editor
Many mobile video apps only allow one or two layers at a time.
KineMaster is different. It uses a multi-track timeline, similar to advanced editing programs such as Adobe Premiere Pro or Final Cut Pro.
This means you can:
- Layer video clips.
- Add images and graphics.
- Insert text titles.
- Mix sound effects and music tracks.
- Record voice-overs.
Each layer can be trimmed, moved, and adjusted independently.
This gives you full control over how your video looks and sounds.
Who Is KineMaster Designed For?
KineMaster is made for creators who want professional editing power on mobile.
It is ideal for:
- YouTubers who create tutorials, reviews, and vlogs.
- TikTokers who edit short creative videos quickly.
- Vloggers who film and upload while traveling.
- Social media managers who need clean, branded content.
- Students and hobbyists learning video editing.
- Anyone who wants professional-level control from their mobile device.
Because everything happens on a phone, you can edit anywhere—at home, outdoors, or while traveling.
Why KineMaster Stands Out
Furthermore, KineMaster packs its powerful timeline with professional tools. You can easily:
- Add Multiple Layers: Combine video, images, text, stickers, and handwriting.
- Precision Editing: Trim, splice, and split clips with frame-by-step accuracy.
- Use Keyframes: Create custom animations and smooth transitions.
- Control Audio: Adjust volume levels on individual tracks and add voice-overs.
- Access a Asset Library: Choose from a huge selection of music, sound effects, fonts, and transitions.
You don’t need a computer to produce high-quality content.
KineMaster lets you create complete videos directly from your Android device.
How to Download and Install KineMaster APK on Android
Looking for KineMaster but can’t find it on the Google Play Store? Sometimes, the app is unavailable in your region or on your device.
Many users then turn to the APK file format. An APK lets you install an app manually.
However, this process requires caution. Follow these steps carefully to ensure a safe and successful installation.
Step 1: Enable Installation from Unknown Sources
Your Android phone blocks installations from outside the Play Store by default. You need to change this setting.
- Go to your phone’s Settings menu.
- Scroll down and select Security or Apps & Notifications.
- Find and enable the option called “Install unknown apps” or “Special app access”.
- You will grant this permission to your web browser (like Chrome or Firefox). Toggle the switch to Allow from this source.
This step tells your phone you trust your browser to install apps.
Step 2: Download the KineMaster APK File
Next, you need to find the correct APK file.
- Open your web browser and visit Filetomob.com.
- Use the search bar and type “KineMaster APK Download”.
- Select the most recent version that is compatible with your device.
- Tap the Download APK button. The file will save to your device’s “Downloads” folder.
Be patient. The download may take a few minutes.
Step 3: Install the APK File
Once the download is complete, you can install it.
- Open your Files or Downloads app.
- Navigate to the folder where the APK was saved.
- Tap on the downloaded KineMaster APK file.
- A new window will pop up. Press the Install button.
The installation process will begin. It should only take a moment.
Step 4: Open and Enjoy KineMaster
After installation, you will see an “App installed” message.
Simply tap Open to launch KineMaster. You can also find its icon in your app drawer, just like any other app.
Tip: Disable the setting: For security, go back to your settings and disable “Install unknown apps” after you are done.
Now you are ready to start editing! By following this guide, you can safely install KineMaster and begin creating your videos.
Key Features of KineMotion for Android
Create stunning videos directly on your Android device with KineMaster. This powerful editor turns your ideas into professional-looking content. Furthermore, it is designed for both beginners and experts. Let’s explore the key features that make KineMaster a top choice.
An Intuitive and User-Friendly Interface
First, KineMaster welcomes you with a clean and organized workspace. The interface is easy to understand. Consequently, you can start editing your videos immediately without a steep learning curve.
- Multi-Layer Editing: Add up to two video layers. You can also include images, stickers, text, and handwriting. This layered approach gives you full creative control.
- Precise Timeline: Pinch to zoom in and out of the timeline for frame-accurate edits. This makes trimming clips and syncing audio perfectly simple.
Powerful Precision Editing Tools.
KineMaster provides precise control over every part of your project. As a result, you can fine-tune your video to perfection.
- Frame-by-Frame Trimming: Cut your clips with absolute accuracy. This is perfect for removing mistakes or creating quick, dynamic jumps.
- Speed Control: Easily create slow-motion or fast-forward effects. You have full control over the playback speed of any video clip.
Dynamic Visual and Audio Effects
Moreover, KineMaster is packed with effects to enhance your story. You can easily add a professional touch.
- Blending Modes & Color Filters: Use blend modes to combine layers creatively. Then, apply color filters to set the perfect mood for your video.
- Chroma Key (Green Screen): This popular feature lets you remove a background. Simply, you can place your subject in any virtual world you choose.
- Audio Ducking: Automatically lower background music when someone speaks. This ensures your voiceover is always clear and easy to understand.
Professional-Grade Audio Control
Great video needs great sound. Fortunately, KineMaster treats audio with the same importance as visuals.
- Voice Recording: Record narration or commentary directly inside the app. This makes adding your voice to any project incredibly easy.
- Audio Mixing: Adjust the volume levels for each audio track in your project. You can balance music, sound effects, and voiceovers perfectly.
- Asset Store: Access a built-in library of royalty-free music and sound effects. Therefore, you can always find the right audio to match your scene.
Easy Sharing and Exporting
Finally, KineMaster makes sharing your finished video simple. After you complete your edit, you can export it directly to your favorite platforms.
- High-Quality Export: Render your videos in up to 4K resolution. This guarantees your content looks sharp on any screen.
- Direct Social Sharing: Save your video to your device. Or, share it instantly to YouTube, Instagram, TikTok, and more.
More Powerful KineMaster Features for Android
KineMaster’s toolset goes beyond basic editing. It offers advanced features that give your videos a professional edge. Let’s explore more tools you can use.
Enhanced Visual Effects and Animation
Firstly, make your videos pop with dynamic movement and stunning visuals. KineMaster brings powerful animation to your fingertips.
- Keyframe Animation: This is a pro-level feature. You can animate any layer, creating smooth movement, scaling, and rotation. For instance, make a sticker fly across the screen or a text box grow in size.
- Video Effects: Access a huge library of real-time effects. Quickly add blur, glitches, or vintage film looks. You can even adjust the effect’s intensity for the perfect result.
- Color Adjustment: Don’t just use filters. Take full control with precise color controls. Independently adjust brightness, contrast, saturation, and more.
Superior Text and Sticker Customization
Furthermore, your messages and graphics can be as dynamic as your video. KineMaster provides incredible flexibility for on-screen elements.
- Multiple Text Fonts: Choose from hundreds of built-in fonts. You can also install your own custom fonts for a unique brand identity.
- Text Animation: Bring your words to life. Apply eye-catching entrance and exit effects to any text layer. This keeps your audience engaged.
- Custom Stickers: Use any PNG image with a transparent background as your own sticker. This is perfect for adding personal logos or custom emojis.
Streamlined Workflow and Performance
Moreover, KineMaster is designed for a smooth and efficient editing experience. It helps you work smarter and faster.
- Instant Preview: See your edits and effects in real-time. There is no waiting to render before you preview your changes.
- Project Templates: Speed up your creation process. Use pre-made templates for social media platforms like YouTube or Instagram Stories.
- Backup and Sync: Use KineMaster Cloud to save your projects securely. You can also access them from other devices, making it easy to collaborate.
Precise Control for Professional Results
Finally, these granular features help you perfect every single detail of your video project.
- Reverse Playback: Easily flip any video clip to play backwards. This is great for creating magical or comedic moments.
- Transition Effects: Seamlessly move between scenes. Browse a wide variety of transitions like slides, wipes, and fades to connect your clips smoothly.
- Clip Volume Controls: Adjust the audio for each individual video clip. This is perfect for balancing sound in videos shot with multiple cameras.
Advanced Audio Controls
First, KineMaster’s audio editor gives you precision. You no longer have to settle for poor sound. These features let you fix and enhance any audio clip.
Key audio features include:
- Audio Volume and Fade Effects: Adjust the volume of any clip with a simple slider. You can also add smooth fade-ins and fade-outs. This prevents audio from abruptly starting or ending.
- Precise Audio Sync: Did your sound get slightly out of sync? Simply drag the audio clip on the timeline. This allows you to perfectly match sound with your video footage.
- Ducking (Auto-Ducking): This is a vital feature. It automatically lowers background music when someone speaks. Your voiceover will always be clear and easy to understand.
- Equalizer (EQ) Presets: Transform your sound with the built-in equalizer. Apply presets like “Bass Boost” for music or “Voice Enhance” for clearer dialogue.
Furthermore, KineMaster supports separate audio layers. This means you can add voiceovers, sound effects, and music on different tracks. You have complete freedom to mix them independently.
AI-Powered Tools
Additionally, KineMaster uses Artificial Intelligence (AI) to save you time. These smart tools handle complex tasks instantly. They help you achieve professional results with minimal effort.
- AI Style Transfer: Transform your video’s look completely. This tool analyzes your footage and applies artistic styles. You can make your video look like a painting or use unique color grades.
- AI Background Removal (Chroma Key): Easily remove or change your video’s background. The AI accurately detects edges, making green screen work simple. This is perfect for product reviews or creative effects.
- Auto-Adjustments: The AI can analyze your clip and suggest improvements. It can automatically correct color balance, exposure, and more.
In conclusion, KineMaster is a feature-rich mobile studio. These advanced tools empower you to push creative boundaries. Therefore, you can produce high-quality, engaging video content entirely on your Android device.
KineMaster How-To: Create Your First Amazing Video in 5 Minutes
Ready to make your first video but short on time? KineMaster makes it easy. Furthermore, you don’t need any editing experience. This guide will help you go from a blank slate to a finished video in just five minutes.
Let’s start creating.
Step 1: Start Your Project Right
First, open the KineMaster app. Then, tap the “Create” button. Immediately, you will choose an aspect ratio.
- 16:9 is perfect for YouTube.
- 9:16 is ideal for TikTok, Reels, and Shorts.
- 1:1 works well for Instagram posts.
Choosing the correct ratio first ensures your video looks great on your chosen platform.
Step 2: Import Your Main Clips
Now, it’s time to add your primary video footage and photos. Tap the “Media” button to import files from your phone. Consequently, your clips will appear on the main timeline track. This is your video’s foundation.
Step 3: Trim and Split for Perfect Timing
Next, you need to fine-tune your clips. Simply tap a clip on the timeline to select it. Then, drag the yellow handles at its start or end to trim unwanted parts.
Additionally, you can cut a clip in two. Move the playhead to your desired cut point. Finally, tap the “Split” tool (the scissors icon). This is perfect for removing mistakes or rearranging scenes.
Step 4: Layer on Extra Elements
This step adds depth. Tap the “Layer” button (not “Media”). You have two powerful options:
- Add B-Roll (Media Layer): Select “Media” to place a video or image over your main track. For instance, you can show a close-up while the main video plays underneath. You can drag and resize this layer on the preview screen.
- Add a Title (Text Layer): Select “Text” to create a title. Type your message and use the options to change the font, color, and animation.
Step 5: Set the Mood with Audio
Great videos need great sound. Tap the “Audio” button. Here, you can:
- Browse the Asset Store for free music.
- Import a song from your own device.
The audio will appear on a dedicated track. Adjust its length to match your video.
Step 6: Save and Share Your Masterpiece
You are almost done! Finally, tap the export icon in the top right corner. A menu will appear with export settings.
For best results, choose:
- Resolution: 1080p (Full HD)
- Frame Rate: 30fps
Then, tap “Export.” KineMaster will process your video. Now, you can share it directly to your favorite social media platforms.
Congratulations! You’ve just created your first video with KineMaster. As you can see, professional-looking edits are truly at your fingertips.
KineMaster Free vs. Premium: The Clear Choice for Creators
Choosing between KineMaster Free and Premium is a big decision. New users often wonder if the paid version is worth it.
This guide breaks down the key differences. Ultimately, your choice depends on your goals for your videos.
The Free Version: A Powerful but Limited Tool
KineMaster Free offers a surprising amount of power. You get access to most professional editing tools.
What You Get for Free:
- A full editing timeline.
- Essential tools like trim, splice, and volume control.
- The chroma key (green screen) feature.
- Multiple video and text layers.
However, there are significant limitations.
The Biggest Downside: The Watermark
Every video you export with the free version will have a “Made with KineMaster” watermark in the top-right corner. This can make your content look unprofessional. For many, this is the main deal-breaker.
Other Cons of the Free Version:
- Advertisements: You will see ads while you edit. This can slow down your workflow and disrupt your creativity.
- Locked Premium Assets: The asset store is filled with premium items. These effects, music tracks, and templates are locked in the free version.
The Premium Version: Unlock Your Full Potential
Upgrading to KineMaster Premium removes all restrictions. It transforms the app into a professional-grade editing suite.
Top Benefits of Going Premium:
- No Watermark: This is the number one reason to upgrade. Export clean, professional videos without any branding.
- An Ad-Free Experience: Edit without interruptions. This creates a smoother and faster workflow.
- Access to Everything: Unlock the entire premium asset store. Get exclusive transitions, animations, music, and fonts.
- KineCloud Storage: Back up your projects safely online. This allows you to access and edit them from other devices.
Free vs. Premium: The Final Verdict
So, which plan is right for you?
Choose KineMaster Free if:
- You are a beginner just learning to edit.
- You create videos for personal use only.
- The watermark does not bother you.
- You don’t mind advertisements.
Upgrade to KineMaster Premium if:
- You create content for a YouTube channel, business, or clients.
- You need a professional, brand-free final product.
- You want a faster, ad-free editing experience.
- You need access to the best assets and cloud storage.
Important Consideration: Remember, KineMaster Premium is a subscription. You pay a monthly or yearly fee, not a one-time price.
Conclusion
KineMaster Free is an excellent starting point. It lets you test the core features.
However, for any serious creator, Premium is the clear winner. Removing the watermark and ads alone is often worth the cost. It unlocks the app’s true potential and lets your creativity shine without limits.
Frequently Asked Questions About KineMaster for Android
What is KineMaster?
KineMaster is a full-featured video editing app for Android.
It allows you to edit videos using multiple layers of video, images, text, music, and effects.
It is similar to desktop editing software but designed for mobile use.
Is KineMaster free to use?
Yes.
KineMaster is free to download and use.
However, the free version includes a watermark and ads.
You can remove the watermark by subscribing to KineMaster Premium.
How much does KineMaster Premium cost?
The cost can vary based on your region and ongoing promotions. You can check the latest monthly and yearly subscription prices directly inside the KineMaster app or on the Google Play Store.
How do I save a video without losing quality?
When you export, KineMaster will let you choose the resolution. Always select the highest resolution available (like 1080p or 4K) for the best quality. Using a lower setting will make your video look pixelated.
Does KineMaster support multiple layers?
Yes.
You can add multiple layers of:
- Videos
- Photos
- Text
- Stickers
- Audio
This allows detailed and professional editing.
What kind of music can I use in KineMaster?
KineMaster includes a library of royalty-free music within its Asset Store. The free version gives you some tracks. However, the premium subscription unlocks the entire music library for you to use safely.
Can I remove the KineMaster watermark?
Yes, but you need a KineMaster Premium subscription. This is the main benefit of upgrading. The premium plan removes the watermark from all your exported videos permanently.
Does KineMaster have a chroma key (green screen) feature?
Yes, it does! The chroma key tool is available in both the free and premium versions. You can find it in the layer tools to remove green backgrounds and create cool effects.
Can I export videos in high quality?
Yes.
KineMaster allows exporting videos in HD, Full HD, and even 4K resolution, depending on your device capabilities.
Does KineMaster require an internet connection?
KineMaster works offline for editing and exporting.
However, you need an internet connection to download assets from the Asset Store or use cloud features.
Is KineMaster safe to use?
Yes.
KineMaster is a trusted app available on the Google Play Store.
Just make sure to download it from official or verified sources.
What devices support KineMaster?
KineMaster works on most Android smartphones and tablets.
For the best performance, use a device with enough RAM and storage.